 Sign-up for free online course on ANSYS simulations!
Unable to render {include} The included page could not be found.
Unable to render {include} The included page could not be found.
Design of Experiments
This step samples specific points in the design space. It uses statistical techniques to minimize the number of sampling points since a separate FEA calculation in required for each sampling point.
Response Surface Optimization
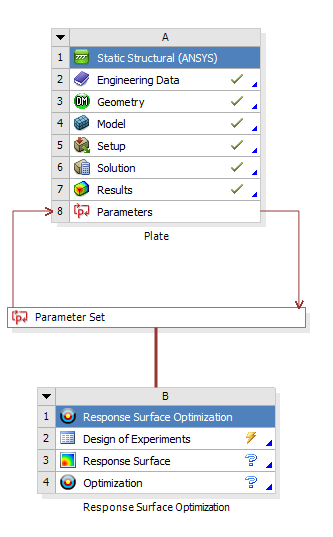
First, Goal Driven Optimization needs to be placed in the Project Schematic. In the left-hand menu called "toolbox" expand Design Exploration. Next, drag Response Surface Optimization and drop it right underneath the Parameter Set. Your project schematic window, should look comparable to the one below. Note that all the systems are connected.
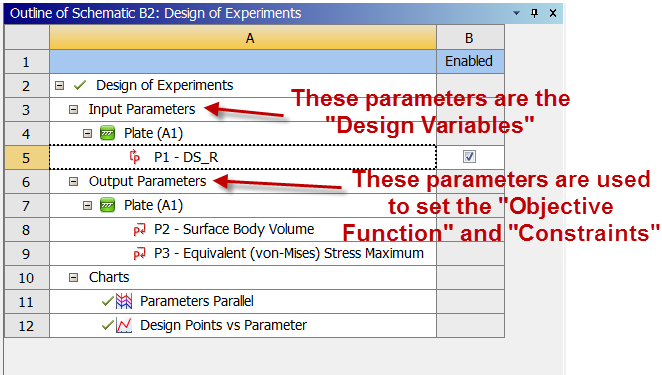
Next, double-click Design of Experiments. Again, we can see our input and output parameters.
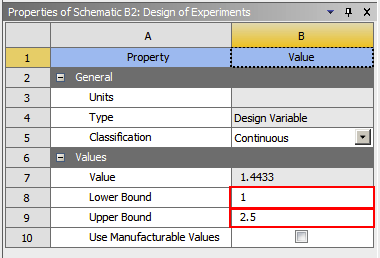
Highlight P1_DS_R and change the Lower Bound to 1 inch and the Upper Bound to 2.5 inches.
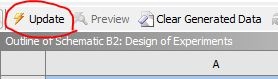
Now, that the radius of the hole is properly constrained click on  . ANSYS just picked what it thinks are the best sampling points according to an algorithm. Note that these sampling points are not necessarily linearly spaced. To get a numerical solution for each of these radii, click Update. Twiddle your thumbs a bit while ANSYS performs some time-consuming matrix inversions.
After the update has completed, click on Return To Project. You may want to save again at this point.
Go to Step 5: Response Surface