 Sign-up for free online course on ANSYS simulations!
Step 1: Create Geometry in GAMBIT
If you wish to skip the steps for grid creation, you can download the mesh file here (right-click and select Save As...) and go to Step 4. |
...
The farfield boundary we'll use is the line ABCDEFA in the figure above. c is the chord length.
Start GAMBIT
Create a new directory called airfoil and start GAMBIT from that directory by typing gambit -id airfoil at the command prompt.
Under Main Menu, select Solver > FLUENT 5/6 since the mesh to be created is to be used in FLUENT 6.0.
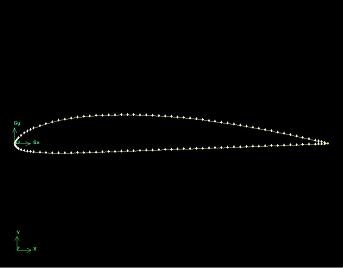
Import Edge
To specify the airfoil geometry, we'll import a file containing a list of vertices along the surface and have GAMBIT join these vertices to create two edges, corresponding to the upper and lower surfaces of the airfoil. We'll then split these edges into 4 distinct edges to help us control the mesh size at the surface.
...
(Click picture for larger image)
Create Farfield Boundary
Next, we will create the following farfield boundary. This picture of the farfield nomenclature will be handy.
...
(Click picture for larger image)
Create Faces
The edges we have created can be joined together to form faces. We will need to define three faces as shown in the image above. Two rectangular faces, rect1 and rect2 lie to the right of the airfoil. The third face, circ1 consists of the area outside of the airfoil but inside of the semi-circular boundary.
...