...
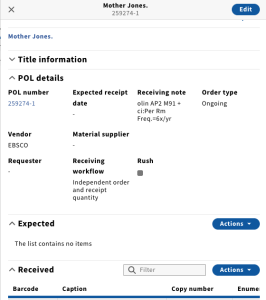
Here relevant check-in information is displayed, particularly the Receiving note, where the most relevant information in terms of check-in is shown (i.e. location, call number, check-in notes).
...
...
Receiving an Issue
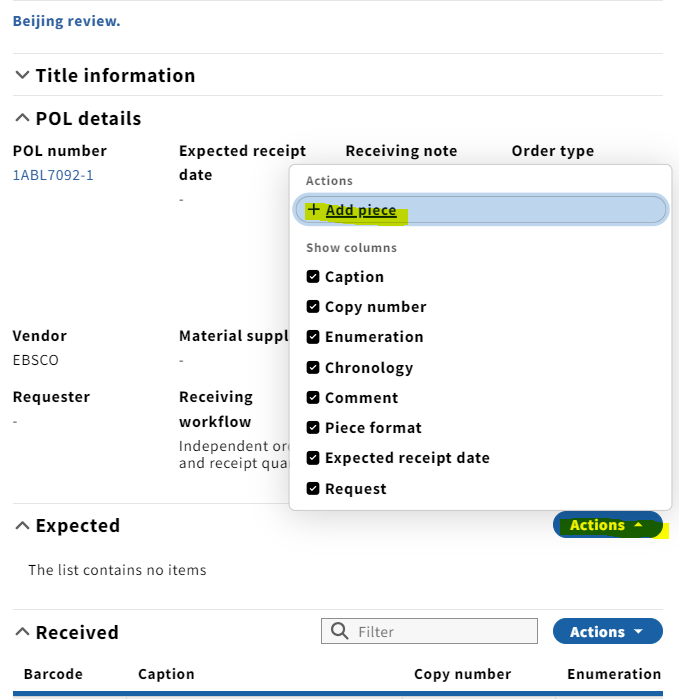
1. As the issues Click Actions followed by Add piece in the Expected field deplete, we will need to add more manually. We can choose to add individual issues as they are received, or add several expected issues for future check-in. In either case, this is accomplished by clicking Add piece.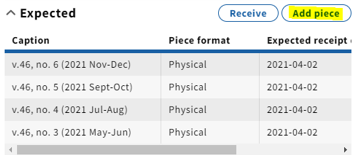 of the third panel.
2. The Edit piece box will pop up. Enter the enumeration/chronology of the issue you are receiving. Click Quick receive.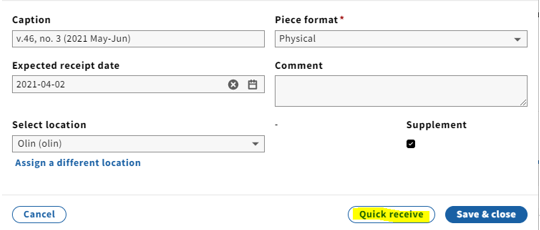
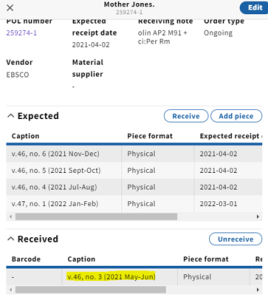
The issue will then appear in the Received field:
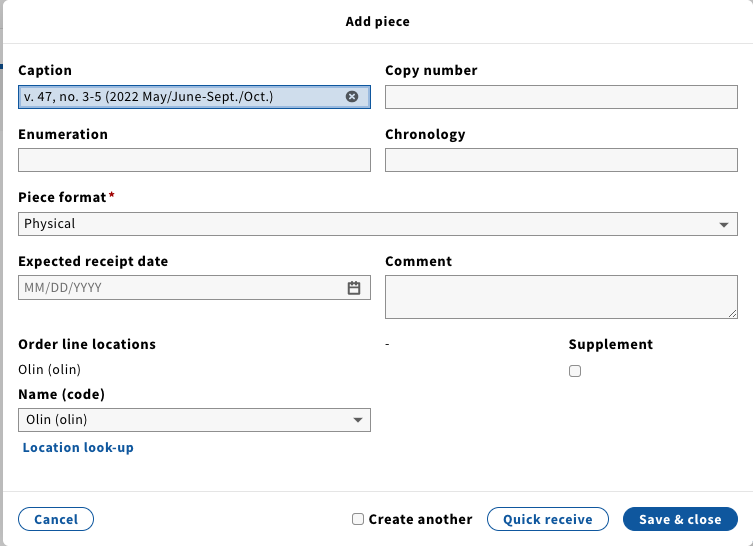
NOTE: An alternative to entering the enumeration/chronology manually would be to 2. A pop-up will appear where you will fill in the enumeration and chronology modeled after the format used in Expected and Received issues. If adding issues for future check-in, you will also want to add an approximate date of when we can expect to receive this issue. This will come in handy for claiming later on. Click Save & close.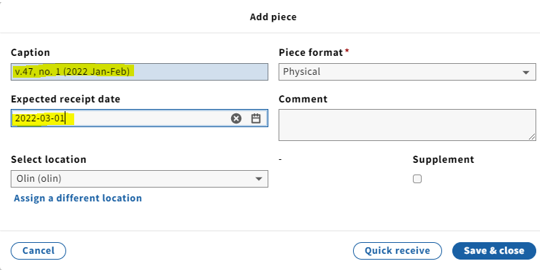
NOTE: As an alternative procedure, click on a previously received issue (in the the Received field), copy the Caption information, and click Cancel. Then under Expected, click Actions, Add piece, paste into the Caption field, edit as needed and click Quick receive.
Receiving an Issue
...
...
NOTE: As mentioned above, if adding an issue at the time it is received (as opposed to predictive issues), you can Quick receive as soon as it's entered and/or edited to match the piece being checked-in.
The issue will then appear in the Received field:
Adding an issue to the holdings receipt history in Inventory
1. As of November '22February 2024, there is no direct connection between the the Receiving and Inventory apps. In order for issues to be publicly displayed in Blacklight and discoverable by patrons, they must also be added to the Receiving history in the holdings record through the Inventory app.
...
1. As we begin to build up a check-in history in the Receiving app, note that multiple consecutive issues can be consolidated onto one line.
2. Multiple Multiple issues can also should be consolidated onto one line in the the Receiving history in the Inventory app.
...
1. When all issues in a volume have been received, the holdings statement should be updated to include the completed volume (similar to how we add a volume to the holdings record in Voyager once it’s complete).
2. To do so, make sure you’re in edit mode by clicking Actions at the top right corner of the screen in the holdings record and select Edit.
3. Scroll to the Holdings statement and add the completed volume. Click Save & close.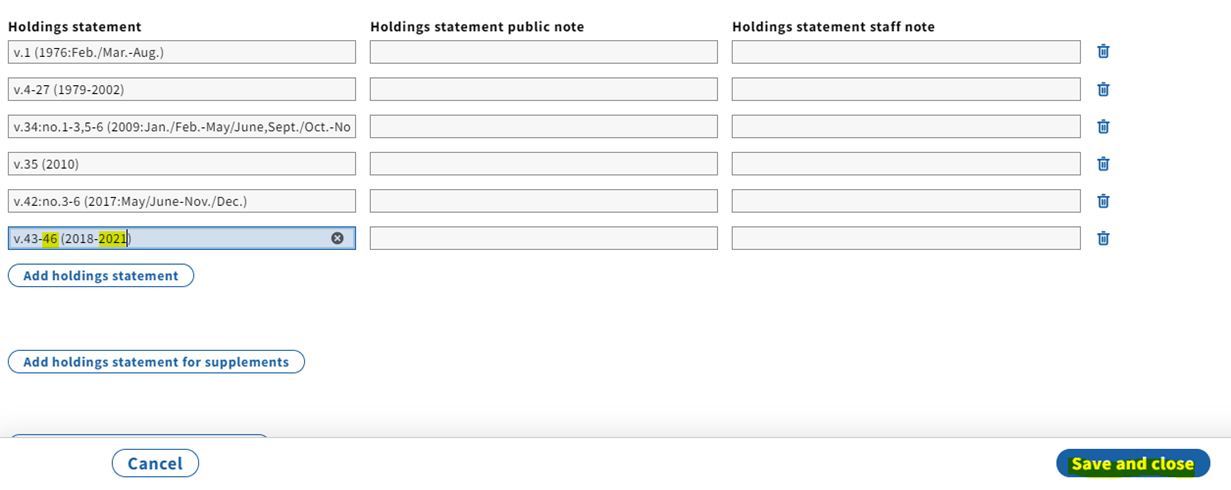
NOTE: The Holdings statement should be consolidated to as few lines as possible. Separate lines should only be created for incomplete volumes and changes in enumeration/chronology (ex. going from Arabic to Roman numerals, new series, etc.).
4. Once you’ve added the volume to the holdings statement, delete the publicly displayed issues by clicking the trashcan(s) to the right of the enum./chron. field(s). There’s no need to uncheck the Public display box, since you’re deleting the lines. Note that publicly displayed issues will only be populating this field.
...
1. From the Instance record, click on Add item.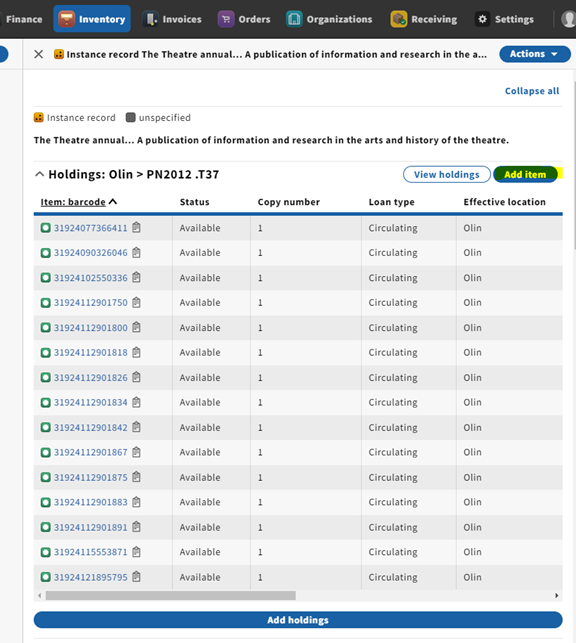
2. Fill in relevant information including Barcode , and Material type (required) and Copy number (this will generally be 1 for serials).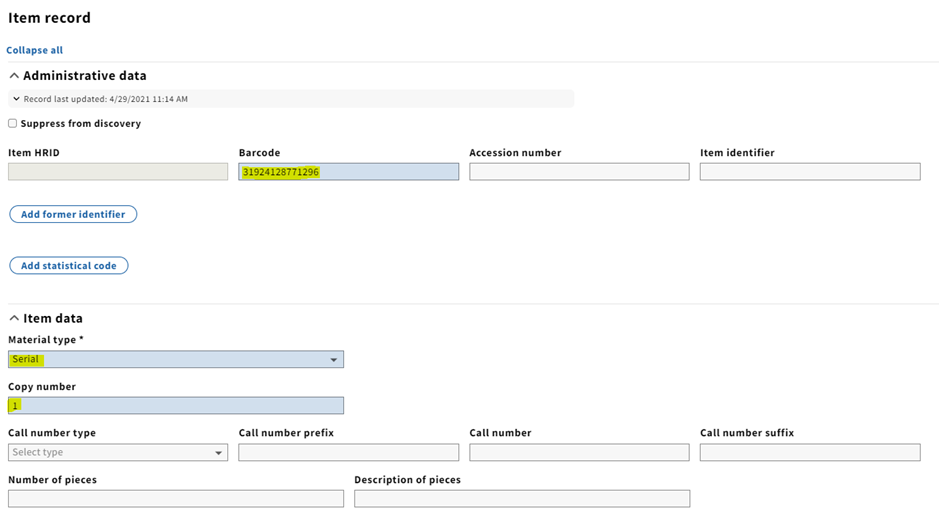
3. Scrolling down will bring you to Permanent loan type which is also a required field.
4. Do not fill in the Location fields, either Permanent or Temporary. Simply leave the drop-down menus as "Select location," which is the equivalent to blank. Selecting a location other than the holdings record location selected may corrupt the location that's printed on the spine label and how it appears in Blacklight, which is why it is best to leave these fields blank.
5. When done filling in the appropriate fields, click Save and close.
6. From the Instance record, clicking Chronology in the Item records display will allow you to sort chronologically. This will allow you to see the item record you just created.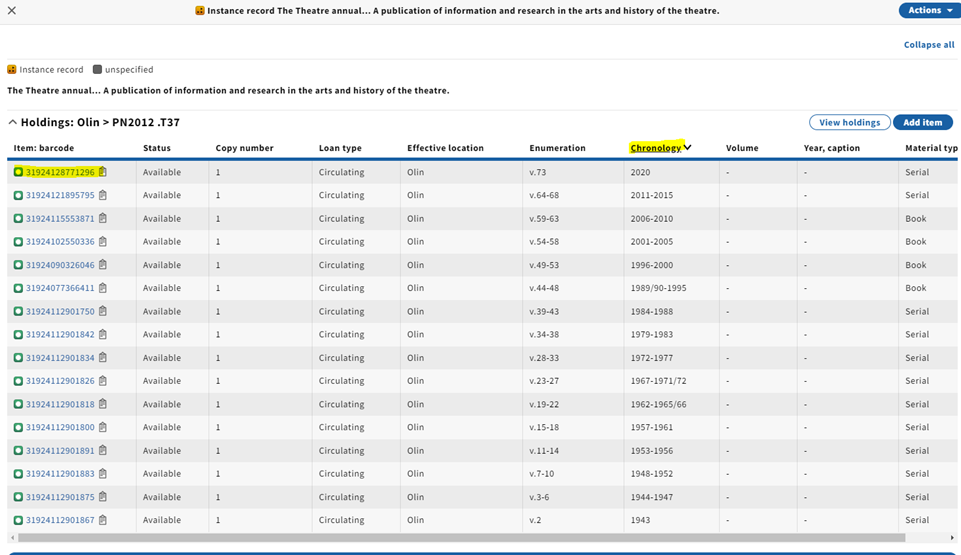
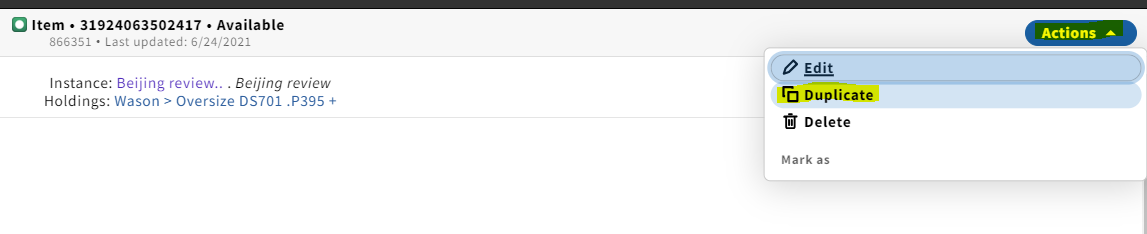
NOTE: An alternative to adding a new item record from scratch is to duplicate an existing item record and edit the enumeration/chronology to match the volume you are creating an item record for.