 Sign-up for free online course on ANSYS simulations!
...
First, we will apply a mapped face meshing control to the geometry. In the Outline window, click on Mesh to bring up the Meshing Toolbar. In the Meshing Toolbar, select Mesh Control > Mapped Face Meshing. Making sure the face selection filter is selected  , select all four faces by holding down the right mouse button and dragging the mouse of all of the quadrants of the geometry. When all of the faces are highlighted green, in the Details view Window select Geometry > Apply. Next, select
...
Next, we will apply edge sizing controls to all of the edges of the mesh. To begin, go to Mesh Control > Sizing. Next, click the edge selection filter  . Select the following 4 edges buy holding Ctrl and using the left mouse button:
...
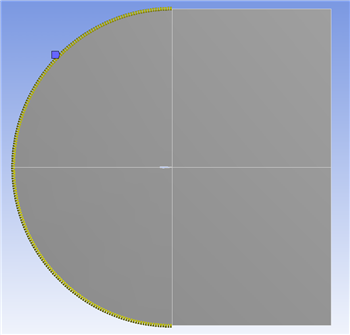
Finally, create a third edge sizing, and select the rounded edges as the geometry. Again, select Type > Number of Divisions, and change Number of Divisions to 100. Select Behavior > Hard. This time, we will not bias the edges.
Now, select Mesh > Generate to generate the mesh. It should look like this.
...