 Sign-up for free online course on ANSYS simulations!
...
Before we open FLUENT, we need to update the project the import the mesh into FLUENT. To do this, click Update Project  . When the project updates, double click Setup
  to open FLUENT.
Initial Settings
Before FLUENT launches, we will be prompted to set some options. In Options check the box next to Double Precision. If you have a dual processor, you can set the option under Processing Options to Parallel, and change the Number of Processes to 2. We don't necessarily need the parallel processes for this simulation as it is fairly simple, but it becomes necessary later when we refine the mesh and complicate the simulation further by changing boundary conditions.
(Double Click) Setup in the Workbench Project Page.
When the FLUENT Launcher appears change options to "Double Precision", and then click OK as shown below.The Double Precision option is used to select the double-precision solver. In the double-precision solver, each floating point number is represented using 64 bits in contrast to the single-precision solver which uses 32 bits. The extra bits increase not only the precision, but also the range of magnitudes that can be represented. The downside of using double precision is that it requires more memory.
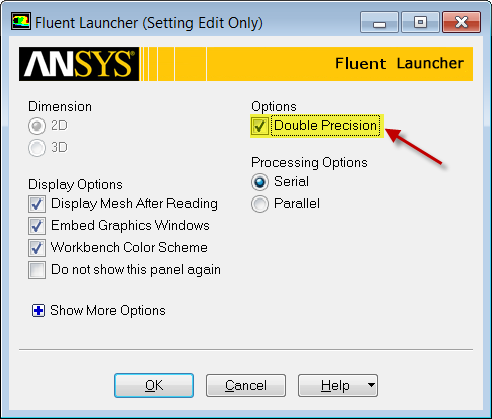

Once the options are set, click OK.
Problem Setup - General
Now, FLUENT should open. We will begin setting up some options for the solver. In the left hand window (in what I will call the Outline window), under Problem Setup, select General. The only option we need to change here is the type of solver. In the Solver window, select Density-Based.
...