 Sign-up for free online course on ANSYS simulations!
...
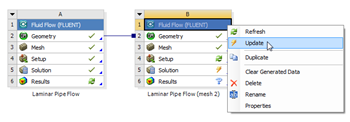
Close the ANSYS Mesher to go back to the Workbench Project Page. Under Laminar Pipe Flow (mesh 2), right click on Fluid Flow (FLUENT) and click on Update, as shown below.
Higher Resolution Image
Now, wait a few minutes for FLUENT to obtain the solution for the refined mesh. After FLUENT obtains the solution, save your project.
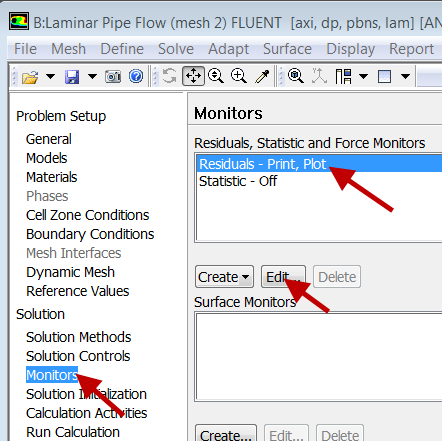
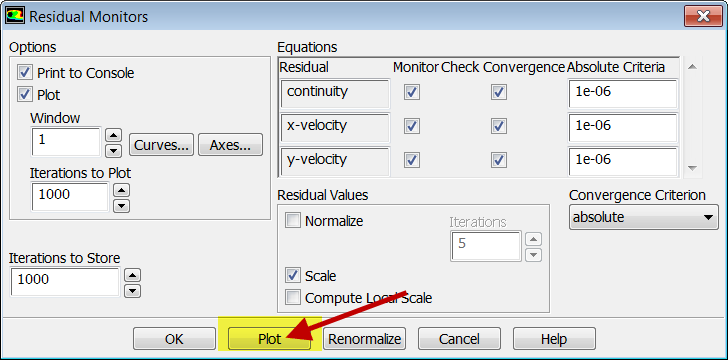
It is necessary to check that the solution iterations have converged. Launch FLUENT by double clicking on Solution of the "Laminar Pipe Flow (mesh 2)" project in the Workbench Project Page. After FLUENT launches, select Monitors > Residuals > Edit... and then Plot, as shown in the images below.
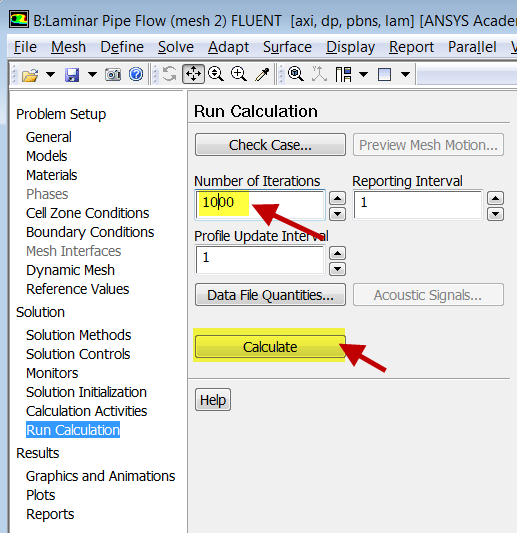
It looks like my solution hasn't converged, so I need to run more iterations by selecting Run Calculation. You may want to increase the number of iterations to, say, 1000. Ensure that you have a converged solution and save the project.
If you double-click on Results for mesh 2 in the project page, you'll see that all results have been updated for the new mesh. Also, you can drag Solution for the original mesh on to Results for mesh 2 in the project page. CFD-Post will automatically add the results from the original mesh to the plots for mesh 2. For instance, you will get the velocity profiles for both meshes in the same plot and you can export that to Excel and compare with the full-developed analytical solution.
For instructions to view the compare results in the traditional FLUENT post-processor, click here and scroll down.
...