Sign-up for free online course on ANSYS simulations!
...
| Note |
|---|
This tutorial contains numerous embedded YouTube videos. You may not be able to see the videos until you approve that the Flash plugin on the website is safe. To approve the plugin, look for a shield logo to the right of the website url bar (in Chrome) or a brick-like icon to the left of the website url bar (in Firefox). Or you can simply click on the weblink for the corresponding video which will take you to the video location on YouTube. |
Geometry
Geometry (Artery without plaques) (Link)
| Widget Connector | ||||||
|---|---|---|---|---|---|---|
|
Geometry (Plaque configuration #1)
...
 FLUENT - Turbulent Pipe Flow - Step 3;(Link)
| Widget Connector | ||||||
|---|---|---|---|---|---|---|
|
...
| Widget Connector | ||||||
|---|---|---|---|---|---|---|
|
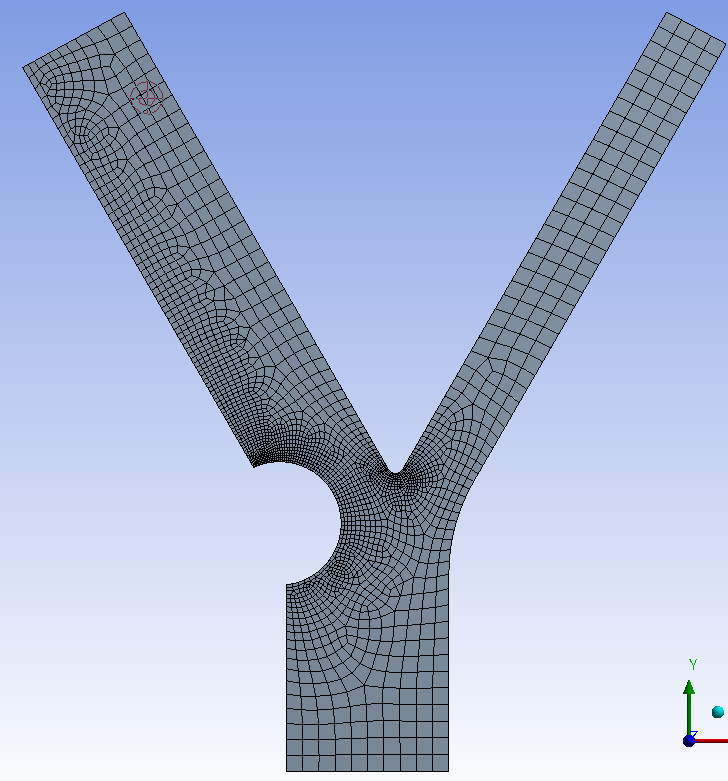
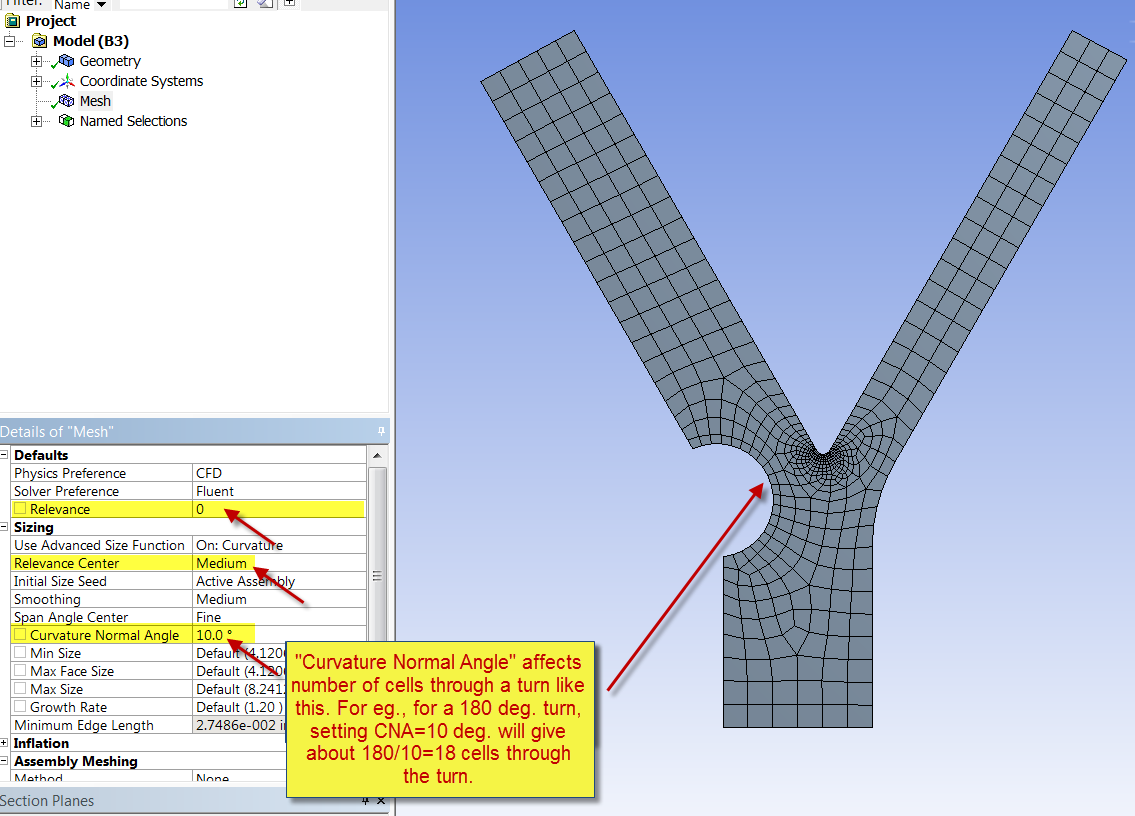
Mesh
Some of the settings you can use to get a better mesh is shown in the figure below.
- The Relevance Center can be set to coarse, medium and fine. After you pick the Relevance Center, you can change the Relevance from -100 to 100, with 100 being the finest within the particular relevance center.
You can insert a sizing for faces and edges along with the mesh settings in the figure.
You can give a bias to edge sizing to cluster cells towards one end of edge. See this page for how to implement a bias to an edge.
Below is a mesh we obtained by playing with these settings. This mesh resolves the separated flow behind the plaque better than the default mesh. It can be further improved though!