 Sign-up for free online course on ANSYS simulations!
...
Now, we need to project the lines we just created onto the surface. Go to Tools > Projection. Select Edges press Ctrl and select on the vertical line we drew (you'll have to select both parts of it), then press Apply. Next, select Target and select the C-Mesh surface, then click Apply.
Once you click  , you'll notice that the geometry is now composed of two surfaces split by the line we selected. Repeat this process to create 2 more projections: one projection the line left of the origin onto the left surface, and one projecting the right line on the right surface. When you're finished, the geometry should be split into 4 parts.
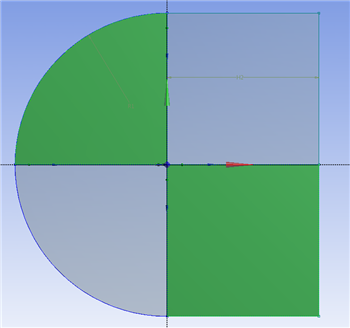
The geometry is finished. Now we are ready to create the mesh for the simulation.