 Sign-up for free online course on ANSYS simulations!
...
| Info | ||
|---|---|---|
| ||
If you would prefer to skip the geometry and mesh steps, then you can download the necessary files here. Download the "zip" file, then extract the files to your working directory. In order to load the necessary files, go to the Workbench Project Page, then (Click) File > Open > "pipe_laminar.wbpj". Lastly, click here to skip ahead to Step 4 of the tutorial. |
Fluid Flow(FLUENT) Project Selection
On the left hand side of the workbench window, you will see a toolbox full of various analysis systems. To the right, you see an empty work space. This is the place where you will organize your project. At the bottom of the window, you see messages from ANSYS.
Left click (and hold) on Fluid Flow (FLUENT), and drag the icon into the empty space in the Project Schematic. Your ANSYS window should now look comparable to the image below.

Since we selected Fluid Flow(FLUENT), each cell of the system corresponds to a step in the process of performing CFD analysis using FLUENT. Rename the project to Laminar Pipe.
We will work through each step from top down to obtain the solution to our problem.
Analysis Type
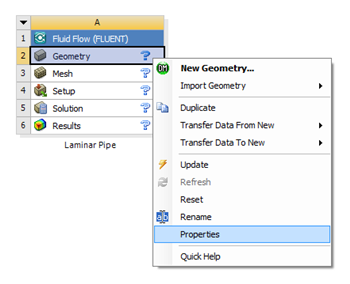
In the Project Schematic of the Workbench window, right click on Geometry and select Properties, as shown below.
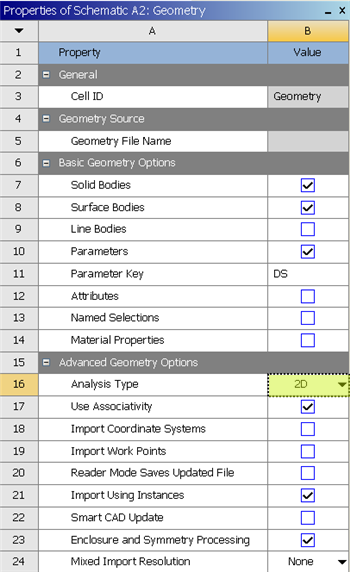
The properties menu will then appear to the right of the Workbench window. Under Advance Geometry Options, change the Analysis Type to 2D as shown in the image below.
...