 Sign-up for free online course on ANSYS simulations!
...
Start > Programs > Lab Apps > ANSYS 1011.0 > ANSYS Product Launcher
In the window that comes up, enter the location of the folder you just created as your Working directoryDirectory by browsing to it. All files generated during the ANSYS run will be stored in this directory_._
Specify plate as your Initial jobname_ Job Name. _ The jobname job name is the prefix used for all files generated during the ANSYS session. For example, when you perform a save operation in ANSYS, it'll store your work in a file called plate.db in your working directory.
For this tutorial, we'll use the default values for the other fields. Click on Run_. _ For this tutorial, we'll use the default values for the other fields. Click on Run_. _ This brings up the ANSYS interface. To make best use of screen real estate, move the windows around and resize them so that you approximate this Screenshot. This way you can read instructions in the browser window and implement them in ANSYS.
...
In the Preferences for GUI Filtering dialog box, click on the box next to Structural so that a tick mark appears in the box. Click OK.
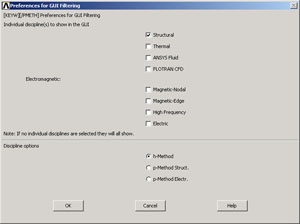
Recall that this is an optional step that customizes the graphical user interface so that only menu options valid for structural problems are made available during the ANSYS session.
...
Enter the parameter value for a:
a=10e-3
Click Accept.
Similarly, enter the other parameter values and click Accept after each.
r=7e-3
p=1e6
E=1e13
nu=0.3
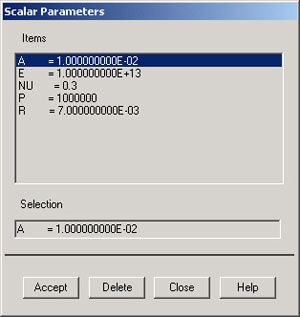
Close the Scalar Parameters window.
...