 Sign-up for free online course on ANSYS simulations!
Step 2: Specify element type and constants
Specify Element Type
We will use SOLID92 elements to mesh the upper and lower disks. This is a 3D 10-Node Tetrahedral Structural Solid element.
...
This brings up the Library of Element Types menu, select Contact in the left field and 3-D target 170 in the right field. Click Apply.
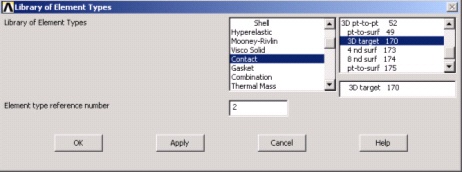
Select Select Contact in the left field and pt-to-surf 175 in the right field. Click OK.
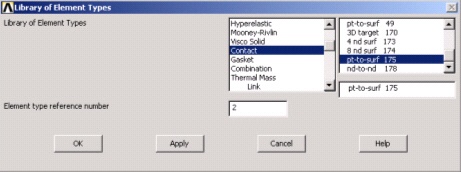
Close Close the Element Types menu.
Specify Element Constants
Main Menu > Preprocessor> Real Constants > Add/Edit/Delete > Add
This brings up the Element Type for Real Constants menu with a list of the element types defined in the previous step.

Select SOLID92 and click OK. You should get a note "The SOLID92 element type does not require real constants". Take a look at the help pages for SOLID92, under SOLID92 Input Summary, and you will find that there are no real constants to be specified for this element. Close the warning message.
Now, let's look at the real constants for TARGE170. Click on Add. Select TARGE170 and click OK.
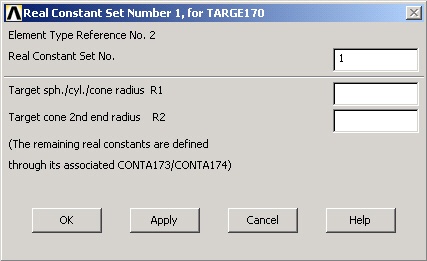
Real constants R1 and R2 define the geometry of the target elements. For contact problems, it is recommended to first try using the default settings, and then change them if difficulties are encountered or the analysis has special situations. ANSYS will default R1 and R2 to zero once the target elements are generated. We'll use the default values for our analysis. Click Cancel.
Now, let's look at the real constants for CONTA175. Click on Add, select CONTA175 and click OK.
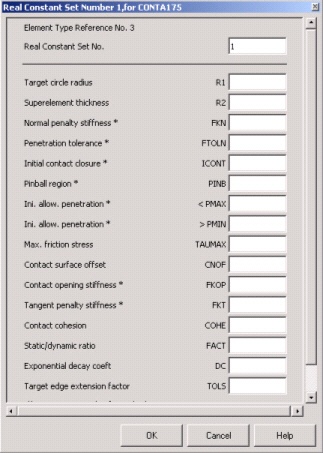
As you can see, ANSYS uses several real constants to control contact behavior. As in the previous case, we'll use the default values set by ANSYS for our analysis. Refer to the help page for CONTA175, for a detailed description of the real constants for this element.
...
Click Cancel and then Close the Real Constants menu.
Save your work
Toolbar > SAVE_DB
Go to Step 3: Specify material properties
...