 Sign-up for free online course on ANSYS simulations!
...
Next, trim the extra lines using the Trim Away tool.

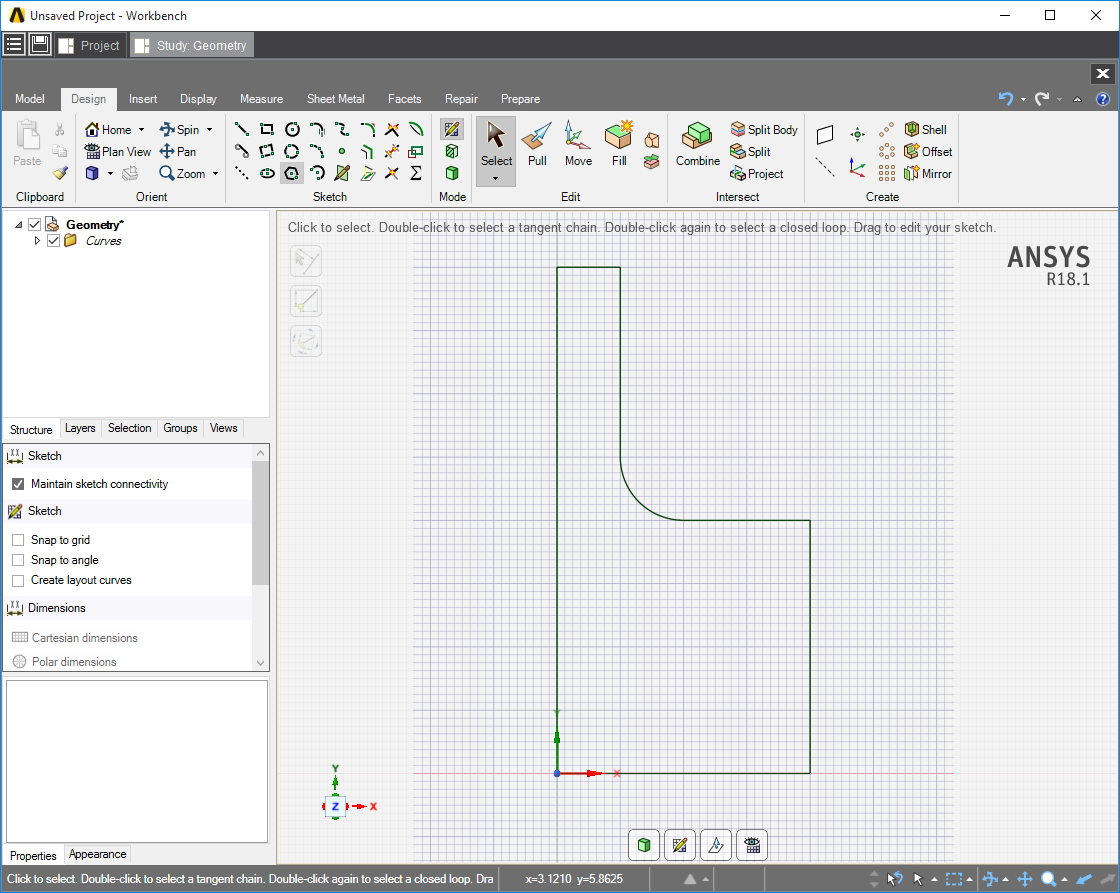
Lastly, use the Create Rounded Corner tool to make a fillet edge between the new corner. Click the vertical line and hover the mouse of the horizontal line then press 1 to create the radius of 1 inch. The Model Editor will display 2.0 in while in sketch mode but when 3D will truly be 1.0 in. The problem specified its radius to be 1 inch. The Create Rounded Corner tool is selected in the Sketch section of the toolbar in the picture below.
In order to convert this sketch into the stepped shaft that is required, it must be rotated around the Y axis. Since the sketch is now complete, select the Pull tool in the Edit section of the toolbar. Utilize the Revolve feature by picking the Y axis to rotate about. Rotate the view slightly to see the yellow, curved arrow, then drag with your mouse to pull the sketch around the Y axis. Press the spacebar and enter “90deg” to achieve the precise rotation needed. It should look like the object in the picture below.
...