What is WebDAV?
WebDAV is a file-transfer protocol, similar to FTP in that it is used to upload/download/modify files collaboratively on the internet. It is the access method of choice for the CIT-IS hosting environments (LAMP, Coldfusion, etc), because it allows users to use their CUWebLogin credentials to get access to their accounts, while still keeping file ownership and permissions on the server side consistent, so multiple users can safely share access to and collaborate on the same site.
WebDAV in Windows
The two popular options for using WebDAV in Windows are the Microsoft built-in DAV client, and WebDrive, a commercial offering with a lot of neat features.
WebDAV Clients vs. Browsers
WebDAV is based on HTTP, so while WebDAV URLs can be accessed in browsers like Firefox, Internet Explorer, and Safari, those browsers don't actually support the WebDAV protocol for actual uploading/downloading of files. What will usually happen if you visit a WebDAV share in a browser is that you'll see the contents of the WebDAV share served as if they were a webpage - such as getting the code for your index or splash file, instead of the processed code.
Using the Microsoft WebDAV Client
1. Right click on My Computer

Click on "Add a network location" OR "Map network drive..."
2. Add a Network Place (if you click on Add a network location)
Click on "Add a Network Place" to add a new WebDAV share.
5. Enter the address of your DAV share
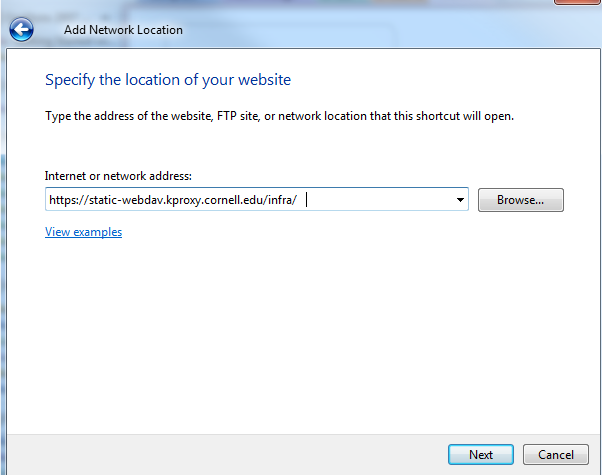
Here is where you enter the WebDAV URL you were provided at signup. This information is also available on the default splash page for your instance. It is usually just your instance's pre-production URL suffixed by -webdav, for example, http://lamp-webdav.cit.cornell.edu for a LAMP site.
For LAMP and CF9 environments, you can visit your splash page and get this information from the Instructions for Using WebDAV area if you aren't sure.
6. Authentication Prompt
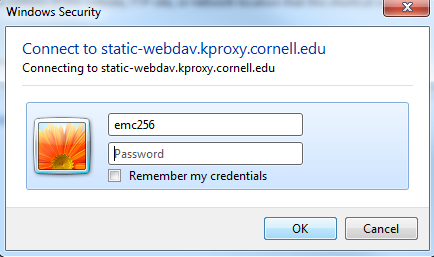
When you click next, you will be prompted for your NetID and your password. Enter your NetID and your password.
9. Name Your New DAV Share
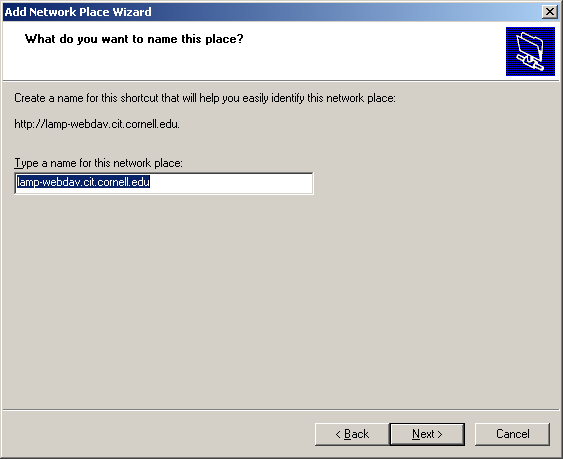
You can name your share whatever you like, the URL for it is already stored.
10. Your DAV Share is Now Available as a Folder
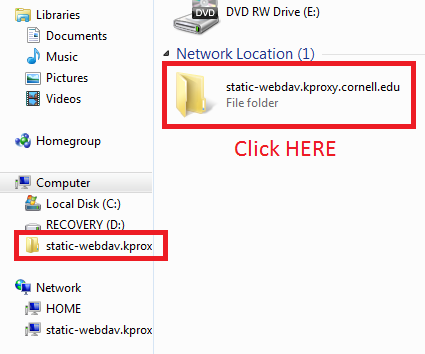
You can now open your DAV share just like it was any other Windows folder from your My Network Places screen. You can now drag and drop files to your website account via DAV and interact with it as if it were a folder on your local machine. The first time you log in, you may be reprompted for your NetID and DAV key - just paste the key in again. Feel free to save the password - you will be prompted again when your key expires.