a web browser with a web inspector kit (I recommend downloading the latest version of Firefox, as it comes with this built in and is used in this tutorial)
~7 hours to go through an HTML and CSS tutorial for those who are not already familiar with both
To get yourself familiar with HTML and CSS, follow this link to a codecademy tutorial that is designed to give beginners the fundamental knowledge of basic HTML and how to manipulate style using Cascading Style Sheets.
After completing the course you are now ready to begin editing the SimCafe confluence!
A large amount of editing in confluence is controlled by the theme itself. To edit specific page content and formatting of pictures / links / text, all the necessary functions are found within the theme edit page function.
Now to put your HTML and CSS skills to use: while a majority of editing can be done through the skin and theme, more specific editing and design requires a CSS stylesheet to be modified to change the appearance to your desire. The stylesheet that controls the SimCafe confluence can be found by first going to the sidebar and selecting Space Tools > Look and Feel > Stylesheet. At the very bottom there is an edit button which will allow you to modify the current stylesheet.
To determine what needs to be put in the stylesheet the achieve your desired look, you first need to determine the proper heading for the item you are trying to edit. Lets go through an example:
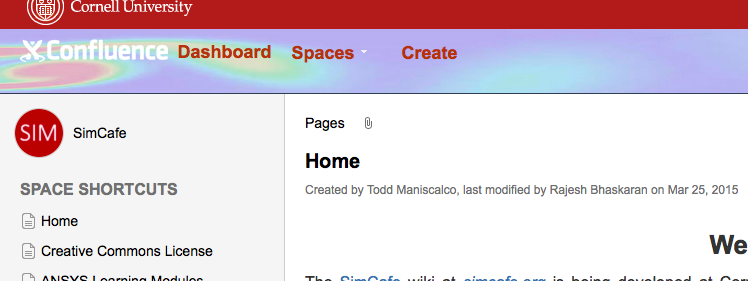
Say on the home screen you want to change the color of the Create button: right now it currently appears like this

First we have to upon up the web inspector to determine how we reference this Create button in our stylesheet. We do this by navigating to Firefox > Tools > Web Developer > Inspector
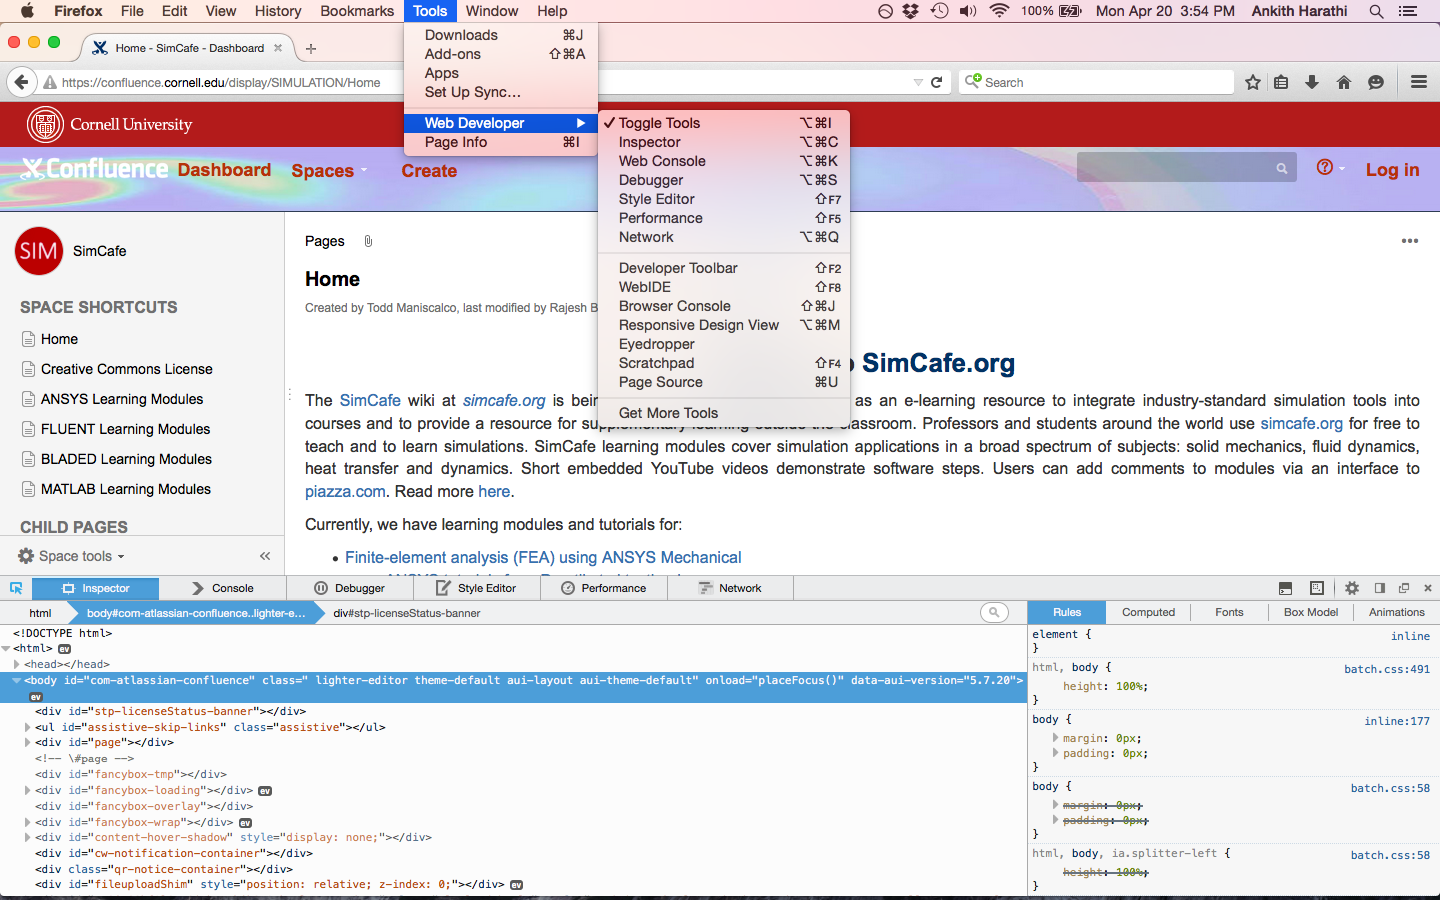
Once you select inspector, the sub pane at the bottom should come up that is your inspection doc, with inspector being highlighted by default. The blue pointer on the left of the inspector box in the new pane indicates that you are in inspect mode. This will now allow you to mouse all over the webpage, and every element will be highlighted when you mouse over it. Lets now select the Create button.
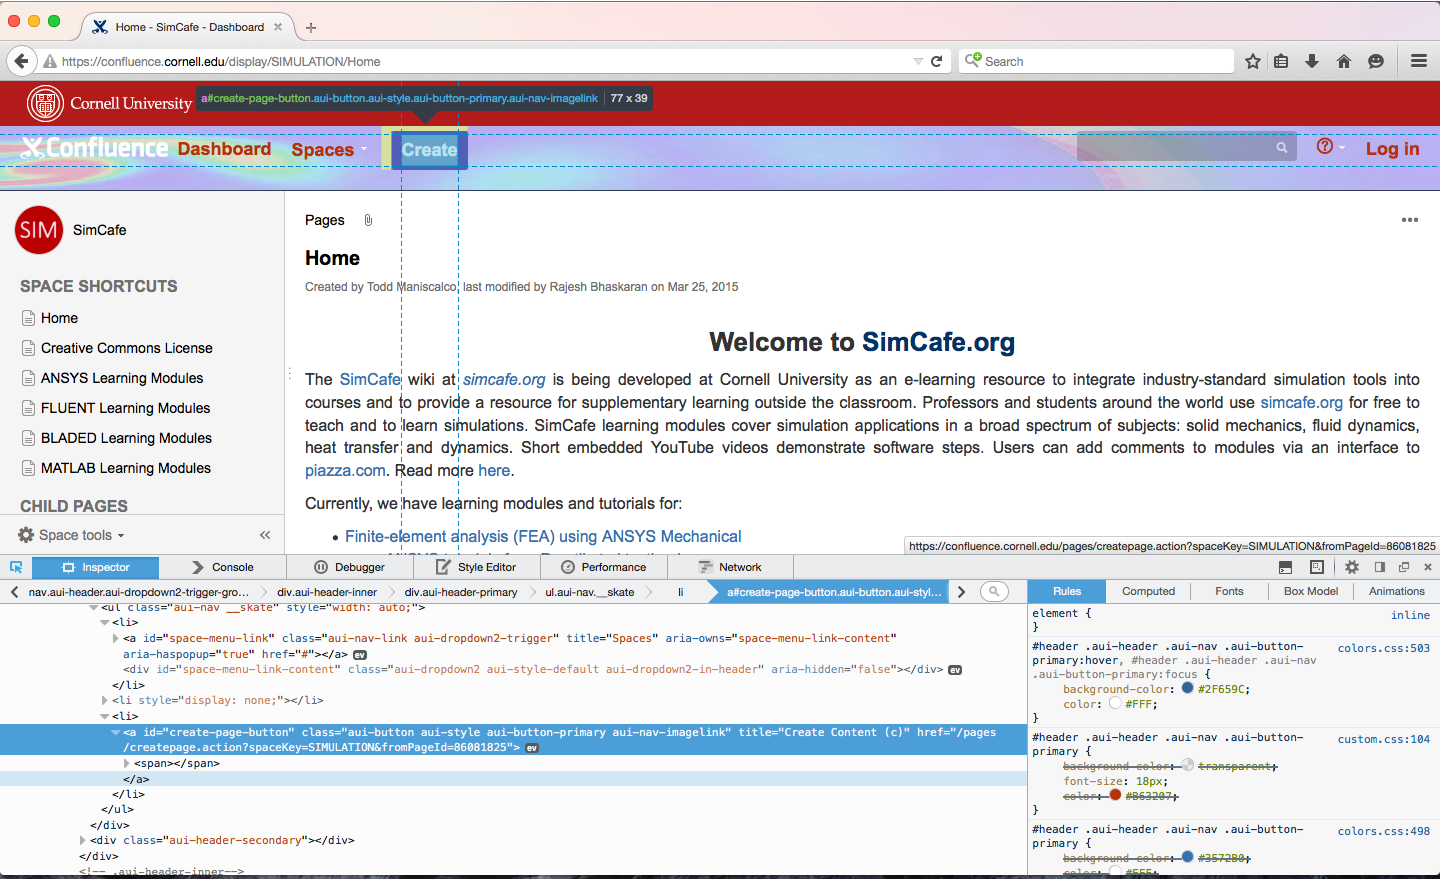
As you can see we have clicked and selected the Create button with our web inspector. The element becomes highlighted and the lines of HTML and CSS that are relevant to that element are displayed on the left and right hand side of the new inspector pane respectively. Keep in mind, we do not have the ability to edit any HTML when using Confluence and the theme builder, we can only edit CSS.
Taking a closer look at the CSS code we see

The CSS on the right shows that the Create button is being referenced by the ID identifier #header and a series of class identifier following (.aui-header .au-nav etc). There are many lines of CSS that have similar identifier lines so which do we want? Reading the first identifier we see that the it contains the primary:hover, which indicates that these lines of CSS control how the Create button appears when a mouse is hovering over it; however, we want to change its default (non-hover) appearance. The next line of CSS seems to do this as the color circle matches the current color of the Create button. We can now simply just copy and paste the entirety of the relevant CSS code and add it to our stylesheet
#header .aui-header .aui-nav .aui-button-primary {
background-color: transparent;
font-size: 18px;
color: #B63207;
}
Now we are free to change the appearance using commands you have learned in the HTML and CSS codecademy tutorial aforementioned. Using the firefox web inspector we can click the color circle and are presented with a palette to choose a different color from
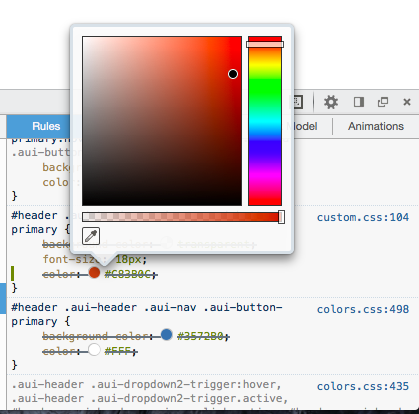
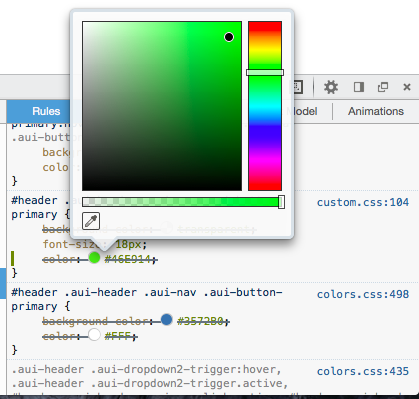
Changing the color in the web inspector in Firefox does not actually change the color even though if you press enter on the new color it does change the appearance on your screen. This is only changed for your screen for that viewing session and the change will not be retained if you refresh or for anyone else. But now you have selected a new color you can copy and paste the hex color code (the #XXXXXX) and put it in your stylesheet
#header .aui-header .aui-nav .aui-button-primary {
background-color: transparent;
font-size: 18px;
color: #46E914;
}
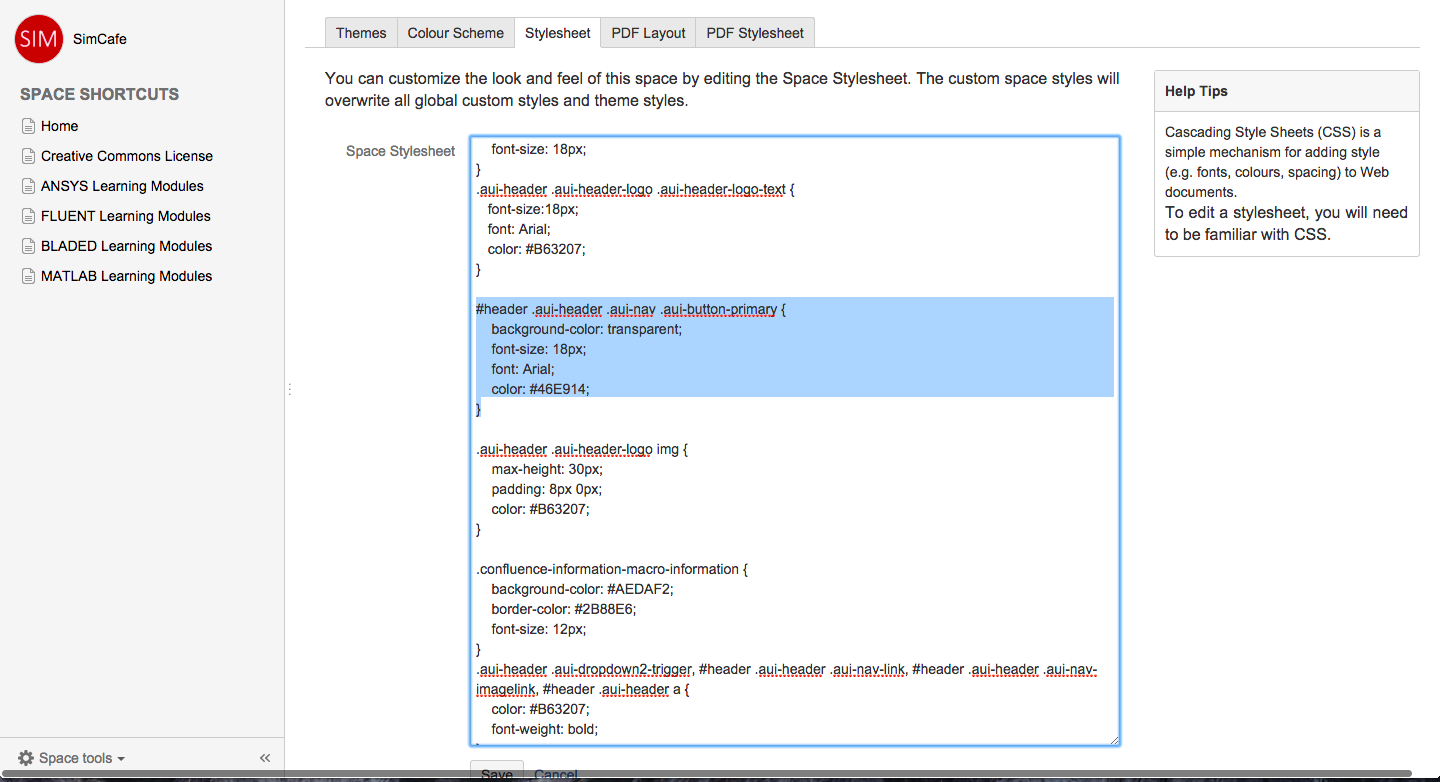

This was a specific example; however the tutorial applies to every element type you can choose to edit. Once you mouse over the element with the inspector selector, you have to determine the correct lines of code to modify by carefully reading through the CSS identifier lines (because some elements have different states, like this Create button had a hover state). The lines of CSS that are striked-through usually indicate lines that are old and have been previously changed for elements that don't have different states.
Once you have the correct lines of CSS identified you can edit the element as much as you'd like using CSS commands using the stylesheet.