 .
.
|
Author: John Singleton, Cornell University Problem Specification |
In order to start Mechanical (Double Click) Model,  .
.
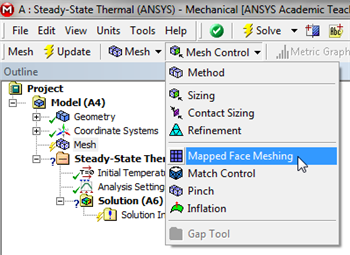
For this simulation we will use a mapped face mesh. A mapped face mesh is that a mesh that can be mapped to a rectangular domain. The domain for this simulation is already rectangular, thus mapped faced meshing will yield a rectangular grid mesh. In order to implement the mapped face meshing, first (Click) Mesh,  . Next, (Click) Mesh Control > Mapped Face Meshing, as shown below.

https://confluence.cornell.edu/download/attachments/146918513/MFM_Full.png |
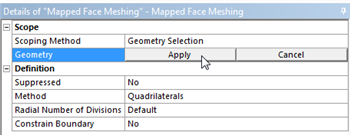
 ,then click on the rectangle. Once the rectangle has been selected (Click) Apply in the "Details of Mapped Face Meshing" table as shown below.

https://confluence.cornell.edu/download/attachments/146918513/DMFM_Full.png |
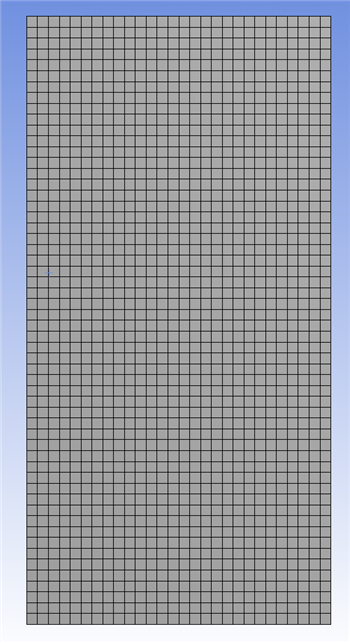
 , in order to generate the mesh. You should obtain the following mesh.

https://confluence.cornell.edu/download/attachments/146918513/GenMesh_Full.png |
Save the project now. Do not close Mechanical.
Go to Step 4: Setup (Physics)
See and rate the complete Learning Module
Go to all ANSYS Learning Modules