From the problem statement, we know that we are solving static structural problem.
With the new release of ANSYS 12, there have been a lot of improvement in term of overall flow. We start our simulation by first starting the ANSYS workbench.
Start > All Programs > ANSYS 12.0 > Workbench
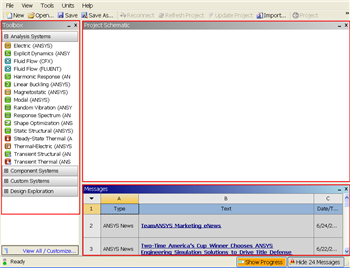
Following figure shows the workbench window.

https://confluence.cornell.edu/download/attachments/111221567/Workbench.png |
At the left hand side of the workbench window, you will see a toolbox full of various analysis systems. In the middle, you see an empty work space. This is the place where you will organize your project. At the bottom of the window, you see messages from ANSYS.

https://confluence.cornell.edu/download/attachments/111234447/Select%20Analysis%20System.gif |
Since our problem involves static analysis, we will select the Static Structural (ANSYS) component on the left panel.
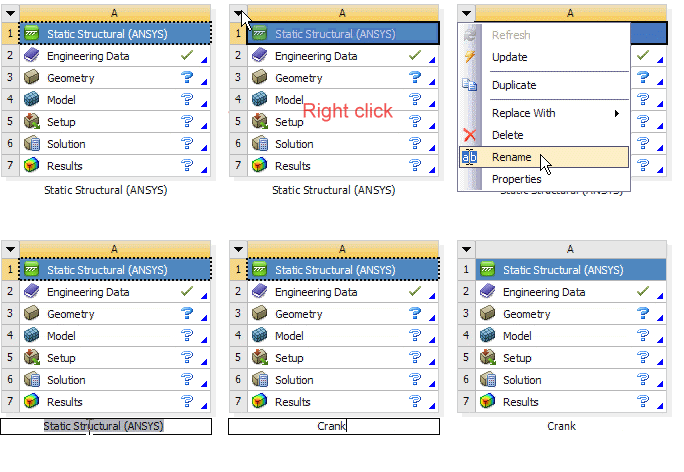
Left click (and hold) on Static Structural (ANSYS), and drag the icon to the empty space in the Project Schematic.
Since we selected Static Structural (ANSYS), each cell of the system corresponds to a step in the process of performing the ANSYS Structural analysis. Rename the project to Crank.

Now, we just need to work out each step from top down to get to the results for our solution.
See and rate the complete Learning Module
Go to all FLUENT Learning Modules