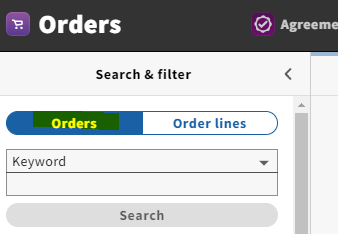
- Begin in the Orders app and make sure you've selected "Orders" at the top of the left-hand column on the screen.
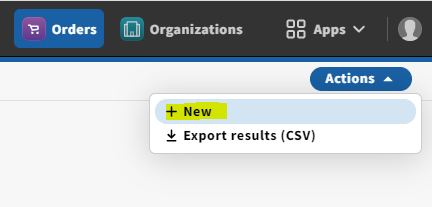
- Click "Actions" in the upper right-hand corner of the screen and select "New."
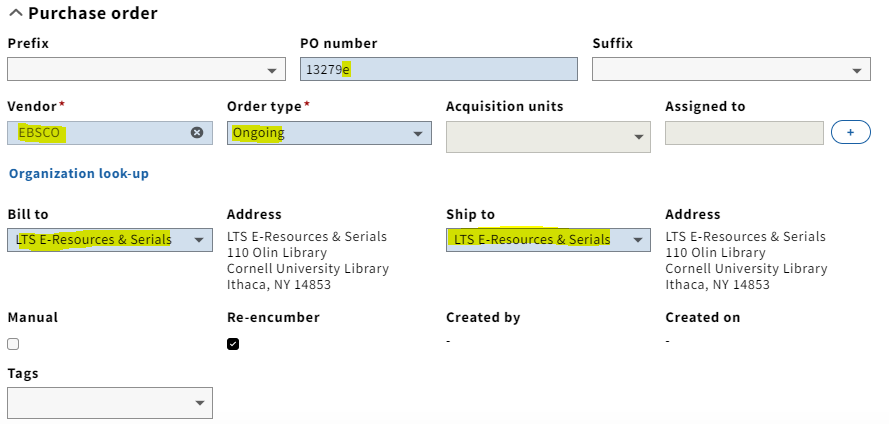
- You'll be directed to the Edit Purchase Order screen, where you can begin filling in your PO "header" information. Fill in the following information in the "Purchase Order" section:
a. PO number: FOLIO will auto-populate this field with a system-generated number. Add an "e" to the end of this number to indicate that this is an e-resource PO
b. Vendor
c. Order type: Ongoing
d. Bill to/Ship to: LTS E-Resources & Serials
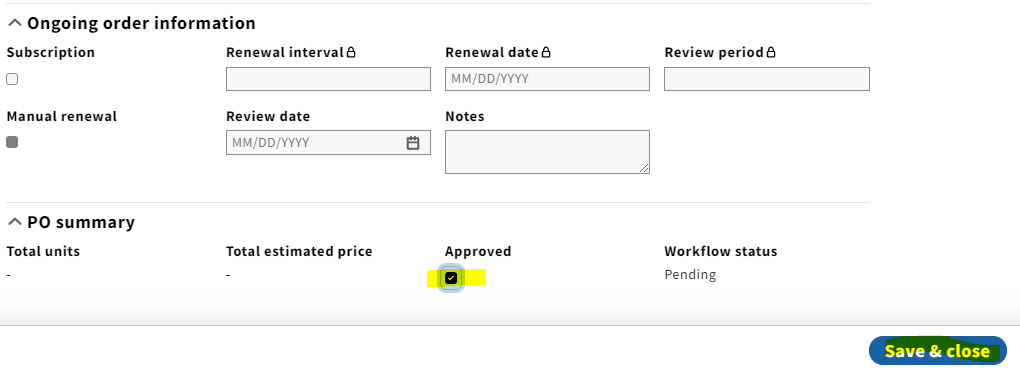
- Scroll down to "Ongoing order information" and check the "Approved" box and click "Save & close".
Note: At this point (as of Oct. 2021), I haven't found the other fields in this section to be useful, but that doesn't mean they won't be in the future. For now, I don't think there's a need to fill them in.
- The purchase order will now display in the third column on the screen. Click on "Add PO line" under the "PO lines" accordion in the purchase order.

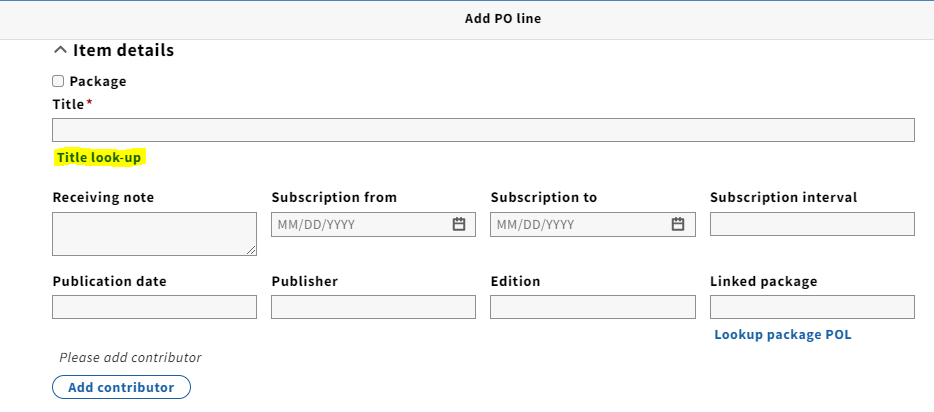
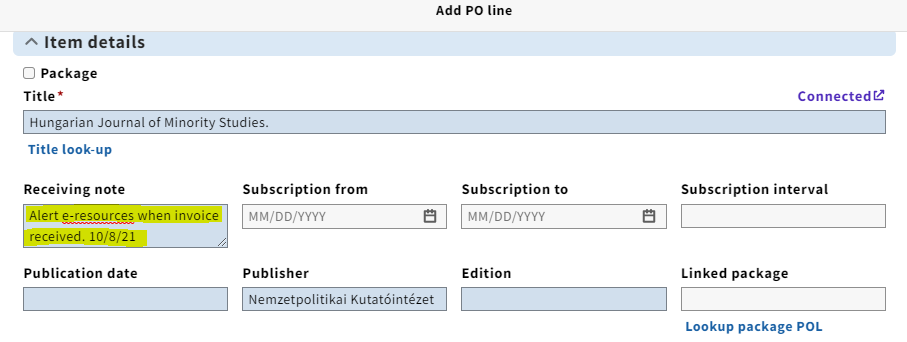
- In the "Item details" section of the "Add PO line" screen, click "Title look-up" to link the POL (PO line) to the appropriate Instance record in Inventory.
- The "Select instance" box will appear where you can search by title name. Select the title you would like to link the POL to.
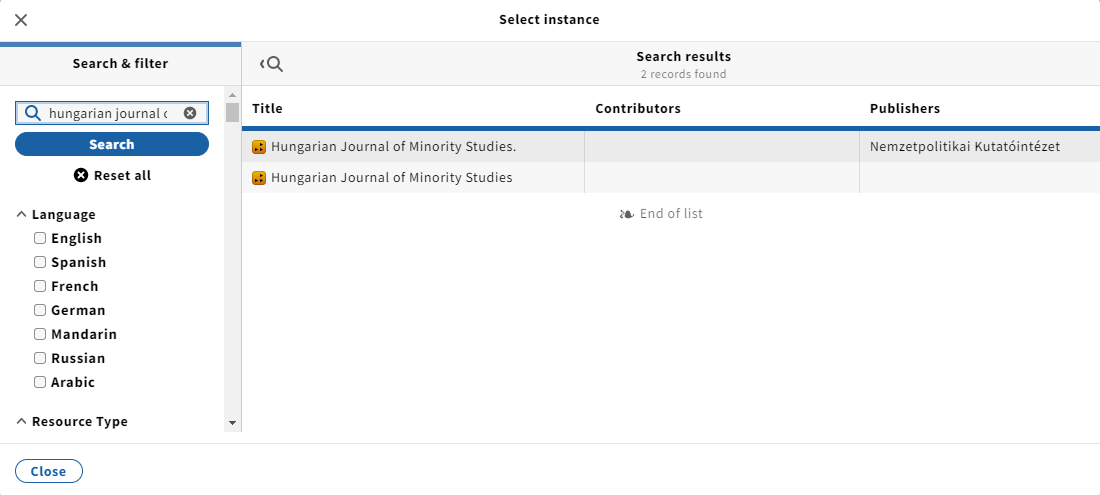
Note: Often the search will result in several records of the same title. Right-clicking on the "Connected" link will bring you to the Instance record of the title you selected. If it happens to be the wrong title, you can click on "Title look-up", search the title again, and select the correct one.

- The "Receiving note" field is a good place to put any pertinent information/notes.
Note: As of Oct. 2021, I've been leaving the subscription fields in this section blank. I haven't yet found a use for them.
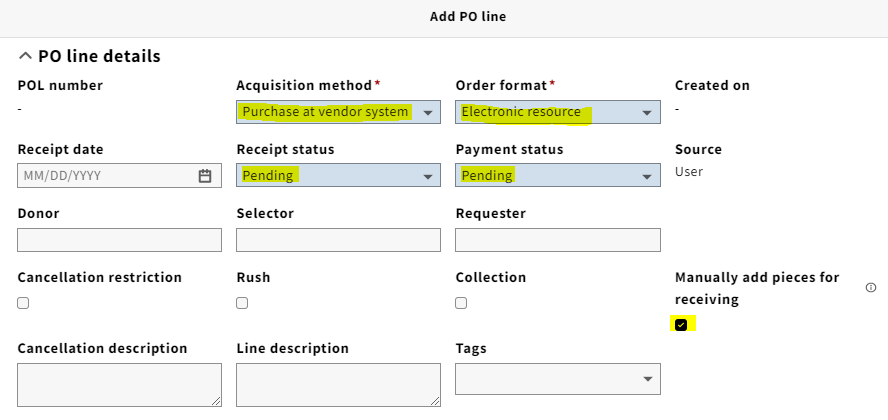
- Scroll down to "PO line details" and fill in the following fields:
a. Acquisition method: In most cases, you'll be selecting "Purchase at vendor system," which we select after placing an order via email or directly to the vendor somehow. The "Purchase" line is used to indicate that the order was placed by EDI, which is something we don't do in Serials/E-Resources.
b. Order format: Electronic resource
c. Receipt status and Payment status: Select "Pending" for both
d. Make sure you check the "Manually add pieces for receiving" box
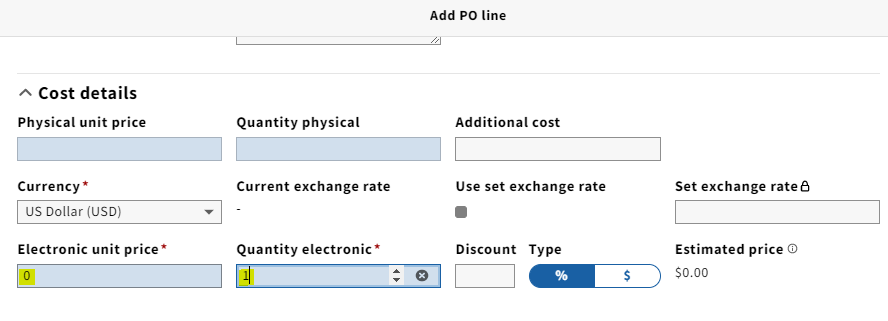
- Scroll down to "Cost details" and fill in the following fields:
a. Electronic unit price: 0
b. Quantity electronic: 1
c. Note: currency should always be in US dollars
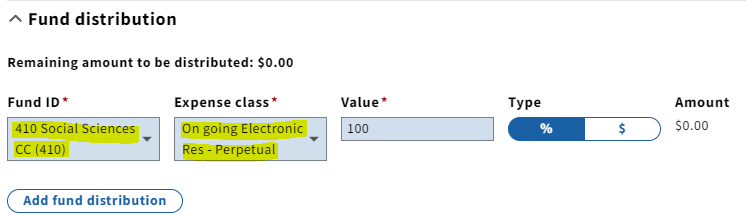
- Scroll down to "Fund distribution" to add the appropriate fund(s). Expense class should either be "On going Electronic Res-Perpetual" or "Non-Perpetual" depending on the e-resource. To add multiple funds, click on "Add fund distribution" and change the "Value" percentage.
- Under the "Location" section, select serv,remo and fill in Quantity electronic with 1.

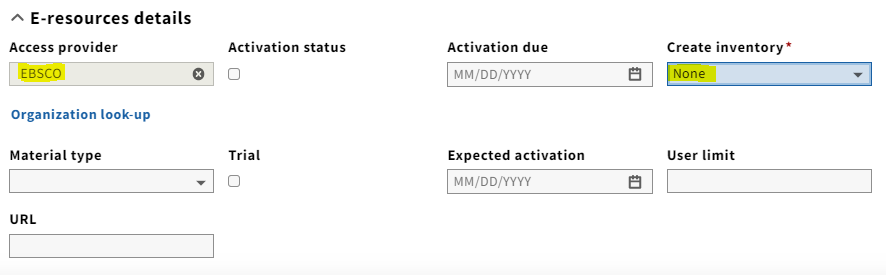
- Under E-resources details, select "None" from the "Create inventory" dropdown menu to avoid duplicate instance records being created and assuming that you will be creating the holdings record manually.
- Click "Save & open order" at the bottom right-hand corner of the screen.

- Verify the purchase order and the purchase order line display all entered information correctly. To view the PO line from the Purchase Order view screen, click anywhere on the PO line under the "PO lines" accordion.
{"serverDuration": 121, "requestCorrelationId": "d921e3298c87fccc"}