| Table of Contents |
|---|
...
Introduction
| Excerpt |
|---|
Cornell AWS account owners can create custom AWS IAM roles and have them linked to Cornell AD so that users with Cornell netids can use Shibboleth to authenticate to AWS and be granted the privileges in the custom role. |
Cornell AWS account administrators already take advantage of this capability when they use Shibboleth to login to the AWS console. The IAM role named shib-admin in each Cornell AWS account typically grants full admin privileges in the form of the AWS-managed policy named "AdministratorAccess". A second standard role named "shib-cs" grants read-only access to each Cornell AWS account. This is used by the cloud support team when Cornell AWS users ask for assistance with their account. See User Access Control for AWS Accounts for more details and options.
Using CloudFormation?
If you use or would like to try using CloudFormation to do this task, this example CloudFormation template sets up a new role (shib-dba) and assigns privileges to it. You could modify that template to customize the role name and the privileges assigned for some other type of custom role. If you take that route, you'll still need to email cloud-support@cornell.edu with the information necessary for the Cloud Team to setup the corresponding Active Directory group for Shibboleth to use.
Using Terraform?
If you use Terraform, here is an example Terraform-based definition of an IAM role to work with Cornell Shibboleth: shib-role-example.tf
You can modify it customize the role name and the privileges assigned for some other type of custom role. If you take that route, you'll still need to email cloud-support@cornell.edu with the information necessary for the Cloud Team to setup the corresponding Active Directory group for Shibboleth to use.
Create a Custom Role
Follow these steps to create a new custom role in your AWS account:
- Login to your AWS account through the AWS Web console. The link http://signin.aws.cucloud.net will take you to your account.
- Now navigate to the IAM service dashboard and click on "Roles" in the left navigation. Alternatively, just clink on this link to get there: https://console.aws.amazon.com/iam/home?region=us-east-1#/roles
- Click on "Create Role" button
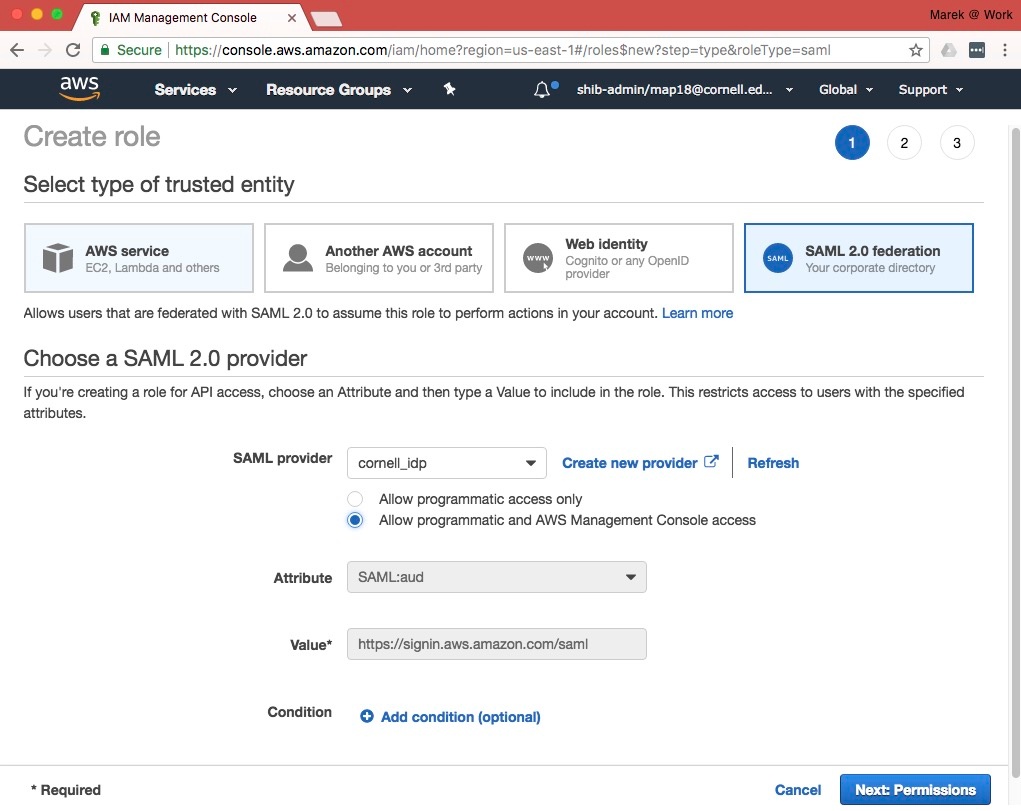
- Select "SAML 2.0 federation" for "type of trusted entity"
- Select "cornell_idp" for the value of "SAML provider"
- Select "Allow programmatic and AWS Management Console access"
- The attribute will autofill with "SAML:aud". Leave as is.
- The value will autofill with "https://signin.aws.amazon.com/saml". Leave as is.
- Skip "Add Condition"
- Click on "Next: Permissions" button
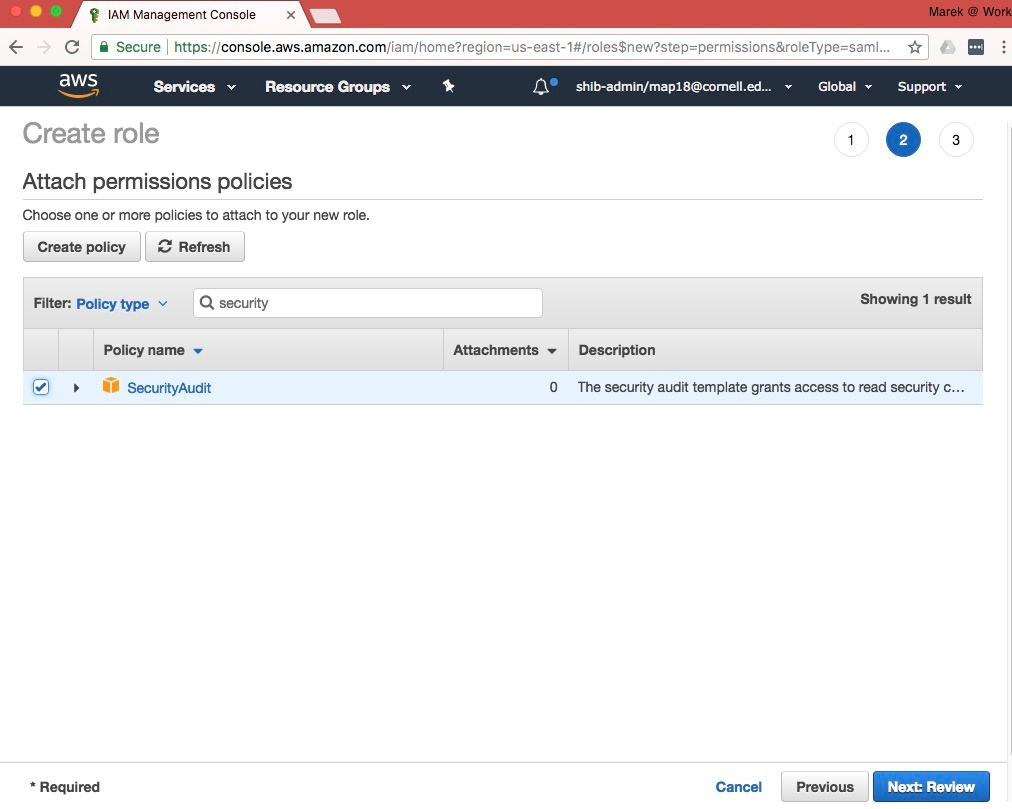
- In the "Attach Policy" step, search for and select the existing policies you wish to assign to the new role. You can select AWS-managed policies, or custom policies that you created. You will be able to change the policies attached to the role later, so don't worry too much about getting this exactly right. You will also be able to add custom inline-policies to the role later as well. For this example, we selected the "SecurityAudit" AWS-managed policy. Click on "Next: Review" when you are finished selecting policies. If you don't know exactly which policy to assign, you can skip this step and not assign any.
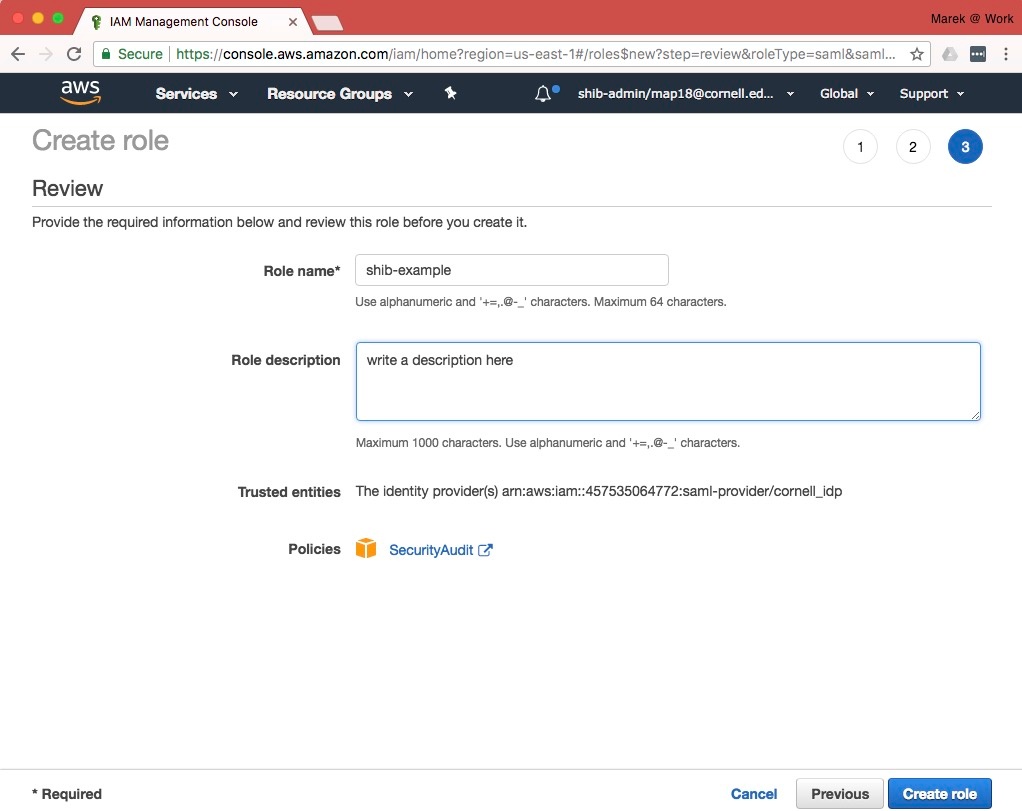
- Enter a named for the new role. The name must begin with the prefix "shib-" and contain no other hypens. E.g., "shib-example". Enter a Role Description.
- Review the remaining fields. Click "Create Role".

Setup an AD Group for the New Role
The next part of the process is to create and configure the AD group connected to this role. This is done by the Cloud team.
- Send an email to cloud-support@cornell.edu with the following information:
- The name of your new role. In this example, that's "shib-example".
- The 12-digit account number of your AWS account.
- The name of the Cornell unit associated with the account (e.g. CALS).
- The name of the existing AD Security Group that contains the list of Cornell netIDs you wish to be able to use this role in your account.
- Since this AD Security Group will live in your OU structure you will be able to modify the group membership as needed following your existing practices.
- Note: In order to maintain security for your AWS account, the person sending this email must be in the shib-admin group for the account.
- The Cloudification services team will create a new AD group with the name structured like CIT-<AWS account number>-role. In the above example, the cloud team would create an AD group named "CIT-095493758574-example".
- When the Cloud Team receives the request, the requester will be updated in the ticket and receive a notification when the AD group is created.
- Now your new custom role is ready to use. We suggest sending an email to the people who will be using it, and have them login to the AWS Web Console using this URL: http://signin.aws.cucloud.net/. If those people have access to only one role in one AWS account, they will automatically be sent to the AWS Web Console assuming that role. If a person has access to more than one "shib" role, they will be asked which role they want to assume after they login.
Using Service Catalog Product shib-role
- Please review - Creating Shibboleth IAM Roles with Service Catalog
Other Resources
- You can modify your custom "shib-" role by changing the policies it grants. See modifying an IAM role.
- You can create new policies to attach to a role. See creating a new IAM policy.
- You can also add inline policies to a role. See managed IAM policies versus inline policies.
...